
What is the best way to make gf bread at home?
Making gluten-free bread at home can be a rewarding experience, especially when you get to enjoy a freshly baked loaf that’s tailored to your dietary needs.
You might be wondering how to achieve that perfect loaf without the gluten. The key lies in understanding the basics of gluten-free baking and using the right ingredients.
With a simple gluten-free bread recipe, you can create delicious bread that rivals traditional bread. In this article, you’ll learn the essentials of making gluten-free bread at home, from choosing the right flours to mastering the baking process.
Key Takeaways
- Understand the basics of gluten-free baking and its benefits.
- Learn how to choose the right gluten-free flours for your bread.
- Discover simple tips for making gluten-free bread at home.
- Master the art of gluten-free bread baking with easy-to-follow recipes.
- Enjoy freshly baked gluten-free bread that’s tailored to your taste.
Understanding Gluten-Free Baking Basics
Making gluten-free bread that’s both delicious and satisfying starts with understanding the principles that guide this type of baking. Gluten-free baking differs significantly from traditional baking due to the absence of gluten, a protein found in wheat, barley, and rye that provides structure and elasticity to dough.
Why Traditional Bread Recipes Don’t Work for Gluten-Free Baking
Traditional bread recipes rely heavily on gluten to create the dough’s framework, allowing it to rise and giving bread its chewy texture. Without gluten, bread can become dense, crumbly, or gummy. To overcome these challenges, gluten-free bakers must use alternative ingredients and techniques. For instance, using a combination of gluten-free flours such as rice flour, almond flour, and coconut flour can help achieve a better texture. Additionally, incorporating xanthan gum or guar gum can aid in mimicking the binding properties of gluten.
| Ingredient | Function | Example |
|---|---|---|
| Gluten-Free Flours | Provides structure and texture | Rice flour, almond flour |
| Binders (Gums) | Mimics gluten’s binding properties | Xanthan gum, guar gum |
| Starches | Enhances texture and browning | Tapioca starch, potato starch |
Essential Equipment for Successful GF Bread Making
Having the right equipment is crucial for making gluten-free bread. A stand mixer or a bread machine can be particularly helpful in mixing and kneading the dough, tasks that can be challenging with gluten-free ingredients. A digital scale is also essential for accurately measuring ingredients, as gluten-free baking is highly sensitive to proportions. Furthermore, a dough scraper or silicone spatula is useful for handling the often-sticky gluten-free dough.
Investing in a good quality oven thermometer ensures that your bread is baked at the correct temperature, which is vital for achieving the right texture and crust color. By understanding these basics and having the right equipment, you can improve your chances of success in gluten-free bread making.
The Science Behind Perfect GF Bread
The art of gluten-free baking is rooted in science, and understanding this can elevate your bread-making skills. To create perfect gluten-free bread, it’s essential to delve into the intricacies of the ingredients and processes involved.
The Role of Proteins and Starches in Gluten-Free Baking
Proteins and starches play a crucial role in gluten-free baking. Proteins help in building structure, while starches contribute to the texture and browning of the bread. In gluten-free flours, the absence of gluten means that other ingredients must compensate for its binding properties. Understanding how different types of flours, such as rice, almond, or coconut flour, behave is key. For instance, some flours like rice flour are high in starch and low in protein, requiring adjustments in the recipe to achieve the right balance.
Using a combination of flours can help achieve a better texture. For example, adding a high-protein flour like almond flour to a starch-rich flour like rice flour can improve the overall structure of the bread.
Understanding Hydration Levels in Gluten-Free Dough
Hydration levels are critical in gluten-free dough. Unlike traditional dough, gluten-free dough often requires more liquid due to the different absorption rates of gluten-free flours. Over-hydration can lead to a soggy or gummy texture, while under-hydration can result in a dense or dry loaf. The key is finding the right balance, which can vary depending on the specific flours used and the environmental conditions, such as humidity and temperature.
To adjust hydration levels effectively, it’s helpful to understand the characteristics of the flours you’re using and to monitor the dough’s consistency closely during the mixing process.
Essential Ingredients for Making GF Bread at Home
The foundation of excellent GF bread lies in the quality and combination of ingredients you choose. When it comes to making gluten-free bread at home, selecting the right ingredients is crucial for achieving the desired texture and flavor.
To start, you’ll need to understand the different types of ingredients that work well together in GF bread recipes. This includes various gluten-free flours, binders, and enhancers that help replicate the structure and taste of traditional bread.
Best Gluten-Free Flour Combinations
Using a single type of gluten-free flour often results in bread that lacks texture or flavor. Instead, combining different flours can help achieve a more balanced loaf. Some of the most effective combinations include:
Rice, Sorghum, and Millet Flours
Rice flour adds lightness, while sorghum and millet flours contribute to a more robust flavor and better texture. These flours are staples in many gluten-free bread recipes.
Tapioca, Potato, and Cornstarch
Tapioca and potato starch help with browning and crust crispiness, while cornstarch aids in structure. These ingredients are essential for creating a satisfying crust in gluten-free yeast bread.
Almond and Coconut Flours
Almond flour adds nutty flavor and extra protein, while coconut flour is high in fiber and can help with moisture retention. However, use coconut flour sparingly due to its high absorbency.
Binders and Structural Ingredients
Since gluten provides elasticity and structure in traditional bread, GF bread requires alternative binders. Two popular options are xanthan gum and psyllium husk.
Xanthan Gum vs. Psyllium Husk
Xanthan gum helps with dough elasticity and is commonly used in commercial gluten-free bread recipes. Psyllium husk, on the other hand, adds fiber and can improve the texture of the crumb.
Eggs and Egg Substitutes
Eggs serve as both binders and leavening agents. For those who are egg-free, alternatives like flaxseed meal mixed with water or applesauce can be effective substitutes.
Enhancers for Flavor and Texture
To enhance the flavor and texture of your GF bread, consider adding ingredients like sugar to help yeast fermentation, or using different types of salt to bring out the flavors. You can also experiment with herbs, spices, and nuts to create unique variations of gluten-free yeast bread.
Step-by-Step Guide to Making Basic GF Bread
With the right ingredients and techniques, you can easily make gluten-free bread at home that rivals store-bought loaves. Making gluten-free bread involves several key steps, from preparing your ingredients to baking the final loaf.
Measuring and Mixing Your Ingredients
Accurate measurement is crucial in gluten-free baking. Start by measuring your dry ingredients, including your gluten-free flour blend, salt, and any other dry ingredients your recipe calls for, using a digital scale for precision. In a large mixing bowl, combine these dry ingredients and whisk them together to ensure they are well incorporated.
Next, measure your wet ingredients, such as eggs, water, and oil, in a separate container. The temperature of your ingredients can affect the yeast’s activity, so ensure your eggs and water are at room temperature. Mix the wet ingredients together before adding them to the dry ingredients. Use a stand mixer with a dough hook attachment to mix the ingredients until they form a cohesive dough.
Proofing and Rising Techniques
Proofing and rising are critical steps in bread making, as they allow the dough to develop flavor and texture. After mixing, place the dough in a greased bowl, cover it with plastic wrap or a damp cloth, and let it rise in a warm, draft-free place. The ideal temperature for rising is between 75°F to 80°F (24°C to 27°C).
The first rise, also known as bulk fermentation, typically takes about an hour, depending on the yeast’s activity and the environment. Once the dough has doubled in size, gently deflate it by folding it over itself a few times. Then, shape the dough into its final form, whether it’s a round boule or a rectangular loaf.
Baking Temperature and Timing Considerations
Preheat your oven to the temperature specified in your recipe, usually around 375°F (190°C) for gluten-free bread. Place your shaped dough on a baking sheet or in a bread loaf pan, depending on your desired loaf shape. Before baking, you can brush the top with egg wash or melted butter for a golden crust.
Baking time will vary based on the size and shape of your loaf. A general guideline is to bake for 35-45 minutes for a standard loaf. It’s essential to check the bread’s internal temperature; it should be around 200°F to 210°F (90°C to 99°C) when fully baked. Let the bread cool on a wire rack before slicing to help it retain its structure.
Advanced Techniques for Artisan GF Bread
Artisan gluten-free bread is within your reach when you apply advanced baking techniques. To take your gluten-free bread recipes to the next level, it’s essential to understand the nuances that distinguish artisan bread from the ordinary.
Creating Crusty Exteriors and Soft Interiors
Achieving a crusty exterior and a soft interior is a hallmark of artisan bread. To accomplish this, you need to control the baking environment. Using a steamy oven during the initial baking phase helps create a crispy crust. You can achieve this by placing a pan of water in the oven or using a dedicated steam injector. Additionally, ensuring your dough has the right balance of hydration is crucial.
For a softer interior, avoid overmixing your dough, as this can lead to a dense loaf. Instead, gently fold your ingredients together until they just come together, then let the dough rest. This technique helps preserve the delicate structure of your gluten-free dough.
Working with Sourdough Starters in Gluten-Free Baking
Incorporating a sourdough starter into your gluten-free bread making can add depth and complexity to your loaves. To create a sourdough starter, you’ll need to mix equal parts of flour and water and let it ferment. Regular feeding will help it become more active and robust. When using a sourdough starter in your gluten-free yeast bread recipes, be sure to adjust the rising times accordingly, as sourdough fermentation is slower than traditional yeast.
Incorporating Seeds, Nuts, and Flavors
Adding seeds, nuts, and various flavors can enhance the texture and taste of your artisan GF bread. When incorporating these elements, be mindful of the ratio of additions to dough. Too many additions can disrupt the dough’s structure. Start with small amounts and adjust to taste. Popular additions include sesame seeds, sunflower seeds, and chopped nuts like almonds or walnuts.
Troubleshooting Common GF Bread Problems
Troubleshooting is a crucial step in mastering the art of gluten-free bread making. Even with the right ingredients and techniques, issues can arise that affect the quality of your bread.
Fixing Dense or Gummy Textures
Dense or gummy textures are common problems in gluten-free bread. To fix this, ensure you’re using the right ratio of flours and not overmixing the dough. Overmixing can lead to a dense loaf, while underbaking can cause gumminess. Check your oven temperature and baking time to ensure it’s accurate.
- Use a mix of gluten-free flours that include rice flour, potato starch, and tapioca flour for a lighter texture.
- Avoid overmixing by mixing wet and dry ingredients separately before gently folding them together.
Addressing Crumbling and Structural Issues
Crumbling or structural issues often result from a lack of binding agents. Xanthan gum or guar gum can help improve the structure by enhancing dough elasticity. Ensure you’re using enough liquid, as insufficient hydration can lead to crumbling.
- Add xanthan gum or guar gum according to the recipe’s instructions.
- Check the ratio of liquid to flour and adjust as necessary.
Solutions for Poor Rising and Flavor Problems
Poor rising can be due to inactive yeast or incorrect proofing temperatures. Ensure your yeast is fresh and that the proofing environment is warm and draft-free. For flavor issues, consider the type of flour used and the proofing time. Longer proofing times can develop more complex flavors.
To enhance flavor, try using a sourdough starter or adding herbs and spices to your dough. Experimenting with different flours and ingredients can also lead to more flavorful bread.
Best Homemade GF Bread Recipes to Try
The art of gluten-free bread making is not just about substituting flours, but about crafting unique and flavorful loaves. With the basics under your belt, you’re ready to explore some delicious gluten-free bread recipes that will elevate your baking game.
Everyday Sandwich Bread Recipe
This recipe is perfect for making a classic sandwich loaf that’s soft, fluffy, and utterly delicious. To make it, you’ll need:
Ingredients List
- 2 cups gluten-free all-purpose flour blend
- 1/2 cup potato starch
- 1/4 cup tapioca flour
- 1 teaspoon salt
- 1 tablespoon sugar
- 1 packet active dry yeast (gluten-free)
- 1 cup warm water
- 2 tablespoons olive oil
Mixing and Baking Instructions
Combine dry ingredients in a mixer, then add warm water and olive oil. Mix until a sticky dough forms. Knead for about 10 minutes until smooth. Place in a greased loaf pan, proof until doubled, and bake at 375°F for 35-40 minutes or until golden brown.
Variations and Substitutions
Try adding different herbs or nuts to the dough for unique flavors. You can also substitute the sugar with honey for a sweeter loaf.
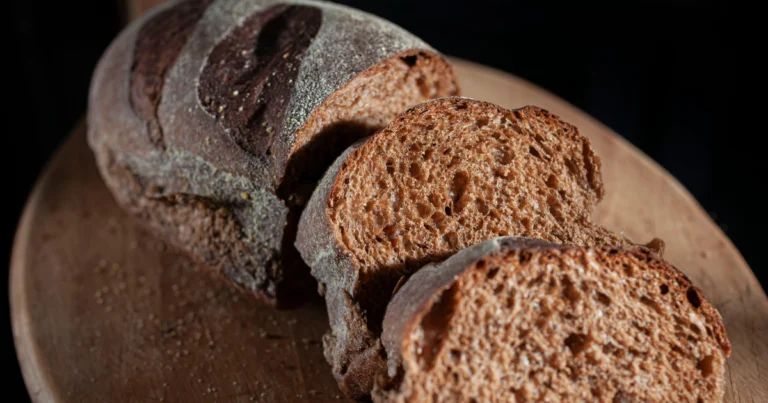
Rustic Artisan Loaf Recipe
For a more rustic and crusty loaf, this artisan recipe is a great choice. It yields a beautifully textured bread with a rich flavor.
Ingredients List
- 2.5 cups gluten-free bread flour
- 1/2 cup water
- 1/4 cup olive oil
- 1 teaspoon salt
- 1 tablespoon yeast (gluten-free)
- 1 tablespoon apple cider vinegar
Mixing and Baking Instructions
Mix all ingredients until a shaggy dough forms. Knead for 5-7 minutes. Shape into a round loaf, proof until doubled, and bake at 425°F for 25-30 minutes or until crusty.
Variations and Substitutions
Experiment with different types of flour blends or add-ins like rosemary and garlic for a savory twist.
Quick and Easy Flatbread Recipe
For a quick gluten-free flatbread, mix 1 cup of gluten-free flour, 1/2 cup of Greek yogurt, and 1/4 teaspoon of salt. Roll out thin, cut into desired shapes, and bake at 400°F for 10-12 minutes or until lightly browned.
These gluten-free yeast bread recipes offer a great starting point for your baking adventures. Feel free to experiment and adjust ingredients to suit your taste preferences.
Storing and Preserving Your Homemade GF Bread
Once you’ve mastered making gluten-free bread at home, the next challenge is keeping it fresh. Proper storage is crucial to maintaining the quality and texture of your GF bread. Cooling your bread completely before storing is the first step in preserving its freshness.
Best Practices for Keeping GF Bread Fresh
To keep your GF bread fresh for a longer period, store it in an airtight container or plastic bag at room temperature. You can also wrap it tightly in plastic wrap or aluminum foil to prevent moisture from entering. It’s essential to keep the bread away from direct sunlight and heat sources. As
“The freshness of gluten-free bread largely depends on how it’s stored.”
- Store in a cool, dry place
- Avoid storing in humid environments
- Use airtight containers or bags
Freezing and Reheating Methods
For longer-term storage, freezing is an excellent option. Slice your bread before freezing so you can thaw only what you need. Wrap the slices or the whole loaf tightly in plastic wrap or aluminum foil and then place them in a freezer-safe bag. When you’re ready to eat it, simply thaw at room temperature or reheat in the oven or toaster. Reheating in the oven at 350°F (175°C) for a few minutes can refresh the bread’s texture.
Conclusion
By now, you should feel confident in your ability to make delicious gf bread at home. With the right ingredients, equipment, and techniques, you can create a variety of gluten-free bread recipes that are both easy to make and enjoyable to eat.
To get started, revisit the basics of gluten-free baking and the essential ingredients needed for making great gf bread. Experiment with different gluten free bread recipe easy variations, such as artisan loaves or simple sandwich bread, to find your favorite.
As you continue to practice and refine your skills, you’ll become more comfortable with the process and be able to create a wide range of gf bread recipes that suit your tastes and dietary needs.
FAQ
What is the best gluten-free flour to use for making gluten-free bread?
The best gluten-free flour for making gluten-free bread is often a combination of rice, sorghum, and millet flours, as they provide a good balance of texture and flavor. You can also experiment with other flours like tapioca, potato, and almond flour to achieve the desired taste and texture.
How do I achieve a crusty exterior and soft interior in gluten-free bread?
To achieve a crusty exterior and soft interior in gluten-free bread, you need to use the right combination of ingredients, including a gluten-free flour blend, xanthan gum or psyllium husk, and eggs. You also need to control the proofing and baking process, using techniques like steam injection or a preheated baking stone to create a crispy crust.
Can I make gluten-free yeast bread at home?
Yes, you can make gluten-free yeast bread at home using a gluten-free flour blend and yeast. However, it requires some trial and error to get the right combination of ingredients and techniques. You need to understand how to work with gluten-free dough, which can be more delicate and prone to crumbling.
How do I store gluten-free bread to keep it fresh?
To keep gluten-free bread fresh, you should store it in an airtight container at room temperature for up to three days. You can also freeze it for longer storage, wrapping it tightly in plastic wrap or aluminum foil and thawing it at room temperature or in the refrigerator.
What are some common problems with gluten-free bread and how can I troubleshoot them?
Common problems with gluten-free bread include dense or gummy textures, crumbling, and poor rising. To troubleshoot these issues, you need to adjust your ingredients, techniques, and equipment. For example, you can try using a different gluten-free flour blend, adjusting the hydration level, or using a different type of yeast.
Is it easy to make a gluten-free bread recipe?
Making a gluten-free bread recipe can be challenging, but with the right ingredients, techniques, and equipment, it can be relatively easy. You need to understand the basics of gluten-free baking, including the role of proteins and starches, hydration levels, and the importance of binders and structural ingredients.
Can I make gluten-free bread without a bread machine?
Yes, you can make gluten-free bread without a bread machine. While a bread machine can simplify the process, you can achieve great results by mixing and kneading the dough by hand or using a stand mixer with a dough hook attachment.