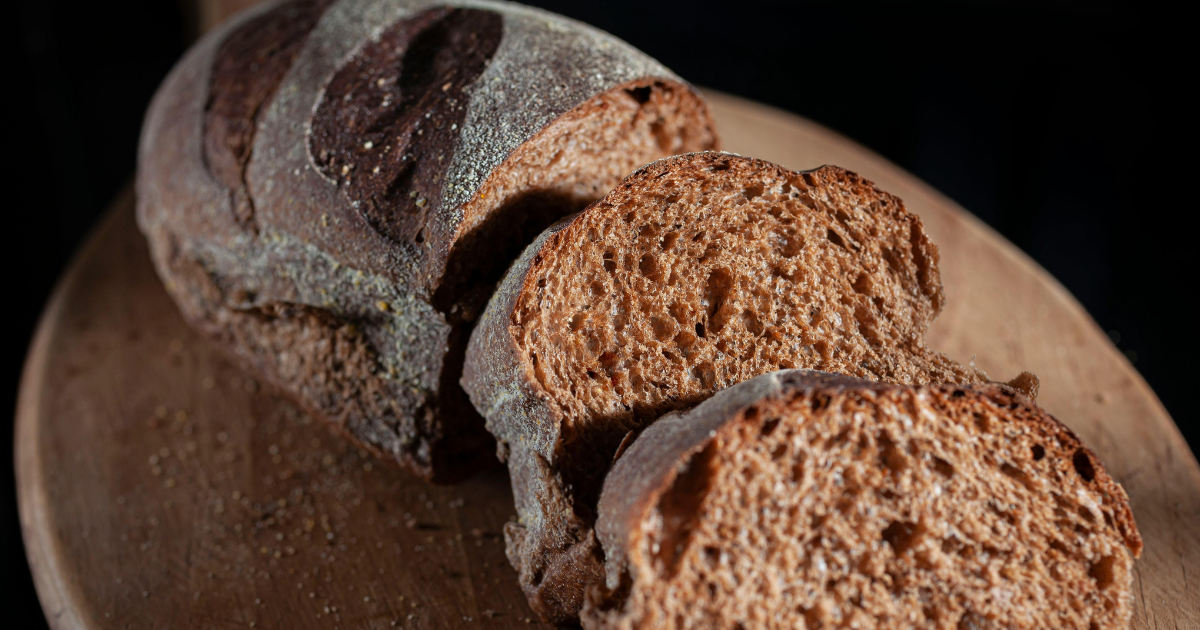
Step-by-step guide on how to make gluten free bread
Mastering gluten free bread recipes can be a transformative culinary journey for home bakers. Learning how to make gluten free bread empowers you to create delicious, safe alternatives to traditional wheat-based breads. Whether you have celiac disease, gluten sensitivity, or simply want to explore new baking techniques, this guide will unlock the secrets to perfect gluten free bread.
Gluten free bread making requires precision, understanding, and specialized techniques that differ from traditional bread baking. You’ll discover that with the right ingredients, tools, and knowledge, creating bakery-quality gluten free bread at home is completely achievable.
Table of Contents
Key Takeaways
- Gluten free bread demands unique ingredient combinations
- Specialized techniques are crucial for successful results
- Understanding flour alternatives is essential
- Proper equipment makes gluten free baking easier
- Patience and practice lead to perfect bread texture
- Moisture management is critical in gluten free baking
- Experimenting with different flour blends enhances flavor
Understanding Gluten Free Bread Basics
Diving into the world of gf bread requires a deeper understanding of what makes these recipes unique. Gluten free bread recipes challenge traditional baking methods, demanding special techniques and ingredients to create delicious, texture-rich loaves.
When you first explore gluten free bread, you’ll notice significant differences from traditional bread. The absence of gluten protein creates unique challenges in bread making that require innovative solutions.
What Makes Gluten Free Bread Different
Traditional wheat-based breads rely on gluten for structure and elasticity. Gluten free bread must compensate for this missing protein through alternative ingredients and techniques.
- Lacks natural protein binding
- Requires different flour combinations
- Needs additional binding agents
- Typically denser in texture
Essential Properties of GF Flours
| Flour Type | Protein Content | Texture Impact |
|---|---|---|
| Rice Flour | Low | Light, slightly grainy |
| Almond Flour | High | Moist, dense |
| Corn Flour | Medium | Smooth, tender |
Common Challenges in Gluten Free Baking
Baking gf bread presents unique obstacles. Achieving the right rise, preventing crumbling, and maintaining moisture are critical skills every gluten free baker must master.
“Gluten free baking is an art of understanding ingredient interactions and compensating for missing gluten proteins.” – Professional Baker
By understanding these fundamental differences, you’ll be better equipped to create delicious gluten free bread recipes that satisfy and surprise.
Essential Equipment and Tools for GF Bread Making
Learning how to make gluten free bread requires more than just ingredients. The right equipment can transform your baking experience and help you create perfect gluten free bread every time. Professional bakers know that specialized tools make a significant difference in bread quality.
When preparing to make gluten free bread, you’ll need some key equipment to ensure success:
- Digital Kitchen Scale: Precise measurements are critical for gluten free bread recipes
- Stand Mixer with Paddle Attachment: Helps create smooth, well-mixed dough
- Non-Stick Bread Pans: Prevents sticking and ensures easy bread removal
- Instant-Read Thermometer: Monitors yeast activation and bread internal temperature
Your gluten free bread making toolkit should also include some additional helpful tools:
- Silicone Spatula for scraping dough
- Parchment Paper for easy baking
- Proofing Container with Lid
- Cooling Rack for proper bread cooling
Investing in quality equipment will help you master how to make gluten free bread with consistent, delicious results. Each tool plays a crucial role in creating texture, structure, and flavor in your homemade gluten free bread.
Best Gluten Free Flour Combinations for Bread
Crafting the perfect gluten free bread recipe easy starts with selecting the right flour blend. Your choice of flour can make or break the texture and taste of your homemade bread. Understanding how different gluten free flours work together is key to creating a delicious loaf that rivals traditional wheat bread.
All-Purpose GF Flour Blends
Pre-made gluten free flour blends offer convenience for home bakers. These mixes typically combine multiple flours to mimic the properties of wheat flour. Some popular brands provide balanced blends that work well in most gluten free bread recipes:
- Bob’s Red Mill Gluten Free 1-to-1 Baking Flour
- King Arthur Gluten Free Measure for Measure Flour
- Cup4Cup Gluten Free Flour Blend
Single Grain Options
Experimenting with single-grain flours can elevate your gluten free bread recipe easy. Each flour brings unique characteristics to your baking:
- Almond Flour: Adds moisture and protein
- Buckwheat Flour: Provides nutty flavor and dense texture
- Sorghum Flour: Offers mild taste and good structure
Creating Custom Flour Mixes
For the adventurous baker, creating a custom gluten free flour blend allows maximum control over your bread’s flavor and texture. A typical successful mix might include:
- 40% rice flour
- 30% potato starch
- 20% tapioca flour
- 10% almond flour
“The secret to great gluten free bread is understanding how different flours interact and complement each other.” – Professional Gluten Free Baker
Key Ingredients for Perfect Gluten Free Bread
Creating delicious gluten free yeast bread requires more than just swapping wheat flour. You’ll need specific ingredients that help replace the structural properties of gluten and ensure a light, delectable loaf.
The foundation of successful gluten free yeast bread starts with understanding critical binding and rising agents. Xanthan gum plays a crucial role in mimicking gluten’s elasticity. This powerful ingredient helps your bread maintain structure and prevents crumbling.
- Xanthan gum: Primary binding agent
- Psyllium husk: Natural fiber for texture
- Potato starch: Provides moisture retention
- Eggs: Additional protein and binding
Yeast selection becomes paramount in gluten free bread baking. Active dry yeast works best for most home bakers. Ensure your yeast is fresh and activate it properly in warm liquid to guarantee optimal rising.
Additional ingredients can elevate your gluten free yeast bread’s flavor and nutrition:
- Olive oil for moisture
- Honey for natural sweetness
- Chia seeds for protein boost
- Apple cider vinegar for texture improvement
Understanding these key ingredients transforms your gluten free baking from challenging to enjoyable. Experiment with different combinations to discover your perfect gluten free yeast bread recipe.
The Science Behind Gluten Free Bread Recipes

Creating delicious gf bread requires understanding the complex science behind gluten free bread recipes. When traditional wheat flour is removed, bakers must employ specific techniques to replicate the structure and texture of classic bread.
The key to successful gluten free bread lies in understanding the unique properties of alternative ingredients and how they interact during baking. Molecular interactions can make or break your gluten free bread recipe.
Role of Xanthan Gum
Xanthan gum serves as a critical binding agent in gluten free bread recipes. This powerful ingredient mimics gluten’s elasticity by:
- Providing structural support
- Preventing crumbling
- Improving texture and moisture retention
Understanding Yeast Activation
Yeast behaves differently in gluten free environments. Proper activation becomes crucial for achieving optimal bread rise and texture. Gluten free breads require precise temperature and hydration to encourage fermentation.
Protein and Fiber Content
Selecting the right flour blend impacts your gf bread’s nutritional profile and structural integrity. High-protein flours like almond and chickpea flour can enhance bread’s protein content while providing additional structure.
Incorporating fiber-rich ingredients helps improve bread’s overall texture and nutritional value. Chia seeds, ground flaxseed, and psyllium husk are excellent additions to gluten free bread recipes.
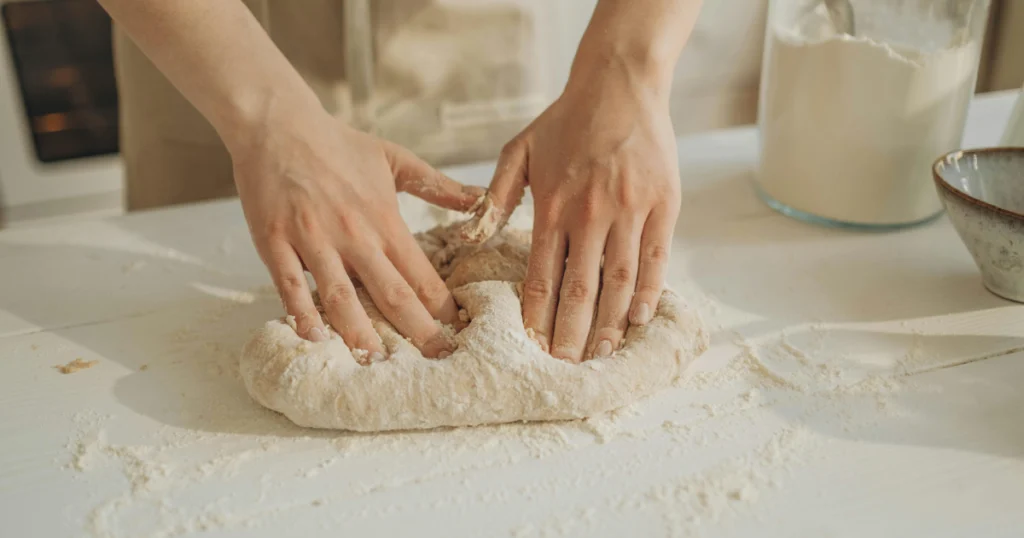
Mixing and Kneading Techniques for GF Dough
Learning how to make gluten free bread requires mastering unique mixing and kneading techniques. Gluten free dough behaves differently from traditional bread dough, demanding special attention to create the perfect texture and consistency.
When preparing how to make gluten free bread, start by understanding the key differences in mixing methods. Gluten free dough typically needs gentler handling to prevent becoming dense or crumbly.
- Use a stand mixer or wooden spoon for even ingredient distribution
- Mix ingredients until just combined – avoid overmixing
- Allow dough to rest for 15-20 minutes after initial mixing
The kneading process for gluten free bread differs significantly from traditional bread making. Since gluten free flour lacks natural protein structure, you’ll need to be more careful with dough manipulation.
| Technique | Purpose | Duration |
|---|---|---|
| Gentle Folding | Incorporate ingredients evenly | 2-3 minutes |
| Rest Period | Hydrate flour, improve texture | 15-20 minutes |
| Light Mixing | Prevent tough texture | Minimal handling |
Pro tip: Use wet hands or a silicone spatula when working with sticky gluten free dough to maintain the best possible texture.
Mastering these techniques will help you create delicious, soft gluten free bread with the right structure and consistency.
Proofing and Rising Tips for Yeast-Based GF Bread
Mastering the proofing process is crucial for creating delicious gluten free yeast bread that’s light and airy. Unlike traditional bread, gluten free dough requires special attention to rise successfully. Understanding the nuances of proofing can transform your baking experience.
Optimal Temperature Conditions
Creating the right environment for your gluten free yeast bread is essential. Yeast thrives in warm, draft-free spaces with temperatures between 75-85°F. Use these strategies to create the perfect proofing environment:
- Warm your oven slightly (turn on for 1 minute, then turn off)
- Cover dough with a damp cloth to maintain moisture
- Place dough in a consistently warm area of your kitchen
Timing Your Rise Perfectly
Gluten free yeast bread typically requires a shorter rising time compared to traditional bread. Expect your dough to rise in approximately 30-45 minutes. Watch for these critical signs:
| Proofing Stage | Expected Appearance | Duration |
|---|---|---|
| First Rise | Slight increase in volume | 30-45 minutes |
| Second Rise | Noticeable volume expansion | 20-30 minutes |
Visual Cues for Perfect Proofing
Recognize when your gluten free yeast bread is perfectly proofed by looking for these indicators:
- Dough should look puffy and slightly increased in size
- Gentle press should leave a slight indentation
- Surface appears smooth and slightly glossy
Pro tip: Don’t overproof your gluten free bread. Excessive rising can cause the structure to collapse during baking.
Baking Temperature and Time Guidelines
Mastering the perfect gluten free bread recipe easy requires precise baking techniques. The right temperature and timing can transform your bread from dense and crumbly to light and delicious.
Different types of gluten free bread demand specific baking approaches. Sandwich loaves typically need lower temperatures compared to artisan-style boules. Understanding your oven’s unique characteristics is crucial for achieving the perfect bake.
- Preheat your oven to 350-375°F for most gluten free bread recipes
- Use an oven thermometer to ensure accurate temperature
- Adjust baking times based on your specific recipe and bread type
| Bread Type | Temperature | Baking Time |
|---|---|---|
| Sandwich Loaf | 350°F | 45-55 minutes |
| Artisan Boule | 375°F | 35-45 minutes |
| Dinner Rolls | 365°F | 20-30 minutes |
Professional bakers recommend using baking stones to enhance crust development. Steam baking can also improve texture and prevent your gluten free bread from becoming too dry. Place a pan of hot water on the bottom rack to create moisture during baking.
Always check your bread’s internal temperature with a food thermometer. A perfect gluten free bread should reach 210°F at its core for optimal doneness.
Storage and Freezing Methods for Fresh GF Bread
Keeping your gluten free bread fresh and delicious requires smart storage techniques. The right approach can help preserve the texture and flavor of your homemade gf bread, ensuring you enjoy every slice to the fullest.
Proper storage starts with understanding the unique characteristics of gf bread. Unlike traditional bread, gluten free varieties are more delicate and can dry out quickly if not handled correctly.
Countertop Storage Strategies
Your freshly baked gf bread has a limited shelf life at room temperature. Follow these essential storage tips:
- Store in an airtight container or bread box
- Keep away from direct sunlight and heat sources
- Consume within 2-3 days for optimal freshness
Freezing Techniques for Long-Term Preservation
Freezing is an excellent method to extend the life of your gf bread. Here’s how to freeze and thaw effectively:
- Slice the bread before freezing
- Wrap individual slices in plastic wrap or wax paper
- Place wrapped slices in a freezer-safe bag
- Remove air to prevent freezer burn
When you’re ready to enjoy your frozen gf bread, thaw at room temperature or use a toaster for a crisp texture. Pro tip: Individual wrapping allows you to remove only the slices you need.
By following these storage methods, you’ll maximize the enjoyment of your homemade gluten free bread, keeping it fresh and delicious for longer periods.
Troubleshooting Common GF Bread Problems
Crafting the perfect gluten free bread recipes can be challenging, even for experienced bakers. When learning how to make gluten free bread, you’ll likely encounter some common issues that can frustrate your baking efforts.
Dense or gummy textures are the most frequent problems with gluten free bread. These challenges often stem from incorrect flour ratios or moisture content. Your bread might turn out heavy and compact instead of light and airy.
- Incorrect flour blend composition
- Excess liquid in the recipe
- Insufficient mixing or kneading
- Improper yeast activation
Solving these gluten free bread challenges requires strategic adjustments. Pay close attention to your ingredient measurements and mixing techniques.
| Problem | Potential Cause | Solution |
|---|---|---|
| Dense Bread | Too much heavy flour | Use lighter flour alternatives |
| Crumbly Texture | Lack of binding agents | Add xanthan gum or psyllium husk |
| Poor Rise | Inactive yeast | Check yeast freshness and activation |
Tip: Always measure ingredients precisely and follow gluten free bread recipes carefully to achieve the best results.
Understanding these common pitfalls will help you create delicious, bakery-quality gluten free bread at home. Practice and patience are key to mastering these techniques.
Conclusion
Crafting the perfect gluten free bread recipe easy takes practice and patience. Your newfound skills in selecting specialized flours, understanding dough dynamics, and mastering baking techniques will transform your kitchen experiences. Each attempt brings you closer to creating delectable, soft bread that rivals traditional wheat-based recipes.
Experimenting with different gluten free bread recipe easy methods helps you develop confidence and intuition. Remember that every baker’s journey is unique, and slight variations in ingredients or techniques can yield different results. Don’t be discouraged by initial challenges – each batch teaches valuable lessons about gluten free baking principles.
Embrace the learning process and continue exploring diverse flour combinations, hydration levels, and rising techniques. Your dedication to understanding gluten free bread making will ultimately reward you with consistently delicious, nutritious homemade bread that meets dietary needs while satisfying your culinary creativity.
By applying the comprehensive techniques outlined in this guide, you’ve equipped yourself with professional-level knowledge. Your gluten free bread making skills will continue to evolve, bringing joy and exceptional baked goods to your table.
FAQ
What makes gluten free bread different from regular bread?
Gluten free bread lacks gluten, the protein that provides structure and elasticity in traditional wheat bread. Instead, it uses alternative flours and binding agents like xanthan gum to create a similar texture and structure. The absence of gluten means you’ll need to use different techniques and ingredients to achieve a comparable rise and consistency.
Can I use regular bread recipes and just substitute gluten free flour?
No, gluten free bread requires specific recipe modifications. You’ll need to adjust liquid ratios, add binding agents like xanthan gum, and use different mixing techniques. Regular wheat bread recipes won’t work directly with gluten free flours due to the fundamental differences in protein structure and moisture absorption.
What are the best gluten free flours for bread baking?
The best gluten free flour combinations typically include a mix of rice flour, tapioca starch, potato starch, and almond flour. Pre-made gluten free all-purpose flour blends are also excellent options. Each flour brings unique properties to your bread, such as moisture, structure, and flavor.
How do I prevent my gluten free bread from becoming dense or crumbly?
To avoid dense or crumbly bread, use a combination of gluten free flours, add xanthan gum or psyllium husk as a binder, and be careful not to overmix the dough. Ensure proper proofing and rising time, and use fresh yeast. Weighing ingredients precisely can also help achieve a better texture.
How long does homemade gluten free bread stay fresh?
Homemade gluten free bread typically stays fresh for 2-3 days at room temperature when stored in an airtight container. For longer storage, you can freeze the bread for up to 3 months. Always slice before freezing and wrap tightly to prevent freezer burn.
Do I need special equipment to make gluten free bread?
While not absolutely necessary, some helpful tools include a digital kitchen scale for precise measurements, a stand mixer with a dough hook, and specialized gluten free bread pans. A kitchen thermometer can also help you monitor yeast activation and proofing temperatures.
Can I make gluten free bread without xanthan gum?
Yes, alternatives like psyllium husk, chia seeds, or ground flaxseed can help bind the ingredients and provide structure. However, xanthan gum is often the most effective binding agent for gluten free bread, mimicking gluten’s elasticity most closely.
Is homemade gluten free bread healthier than store-bought?
Homemade gluten free bread can be healthier as you control the ingredients, reducing preservatives and additives. You can customize the nutritional profile by using whole grain gluten free flours, adding seeds, or controlling sugar and salt content.